In the delightful world of children’s birthday parties, a Bluey cake has quickly become a beloved choice among kids and parents alike. The bright, engaging characters from the popular animated show “Bluey” provide endless inspiration for creative cake designs, making it a delightful centerpiece for any celebration. In this article, we’ll guide you through everything you need to know about creating the perfect Bluey cake, from planning and designing to baking and decorating, including essential tips and tricks to ensure your cake is a show-stopper. Let’s dive in!
Introduction to Bluey Cake
What is Bluey Cake?
A Bluey cake is a themed cake inspired by the Australian animated series “Bluey,” which follows the adventures of a lovable Blue Heeler puppy and her family. These cakes often feature characters like Bluey, her sister Bingo, and other notable figures from the show, presented in creative, vibrant designs. The cakes can be made for various occasions, especially birthdays, and they come in different shapes, sizes, and flavors, making them a versatile choice for any celebration.
The Popularity of Bluey Cakes
Bluey cakes have skyrocketed in popularity due to the show’s widespread appeal. The adorable characters and the show’s emphasis on family and imagination resonate with children and adults alike. Additionally, the colorful and whimsical design elements make Bluey cakes visually appealing, which, combined with their delicious flavors, contribute to their popularity at kids’ birthday parties.
Why Choose a Bluey Cake for Your Celebration?
Opting for a Bluey cake for your celebration brings a touch of fun and excitement to the event. The cake serves as both a treat and a decoration, fitting perfectly into Bluey-themed parties or any occasion where you want to bring joy and delight to children. Moreover, a Bluey cake allows for creativity, as you can personalize it with your favorite characters, colors, and designs, making it a unique centerpiece for the celebration.
By the end of this article, you’ll be well-equipped to design and create a memorable Bluey cake, starting with planning your design and gathering the necessary ingredients and tools. Let’s move on to the next section, where we’ll delve into the planning stage of crafting your perfect Bluey cake.
Planning Your Bluey Cake
Designing Your Bluey Cake
Planning is crucial for creating a show-stopping Bluey cake. When you start, consider the birthday child’s favorite characters and episodes from the Bluey series. These preferences can guide you in selecting a theme that resonates with them, ensuring the cake is both personal and exciting. Moreover, planning helps you avoid last-minute hiccups, so think about the overall design and how it fits into the party’s broader theme.
Choosing a Theme
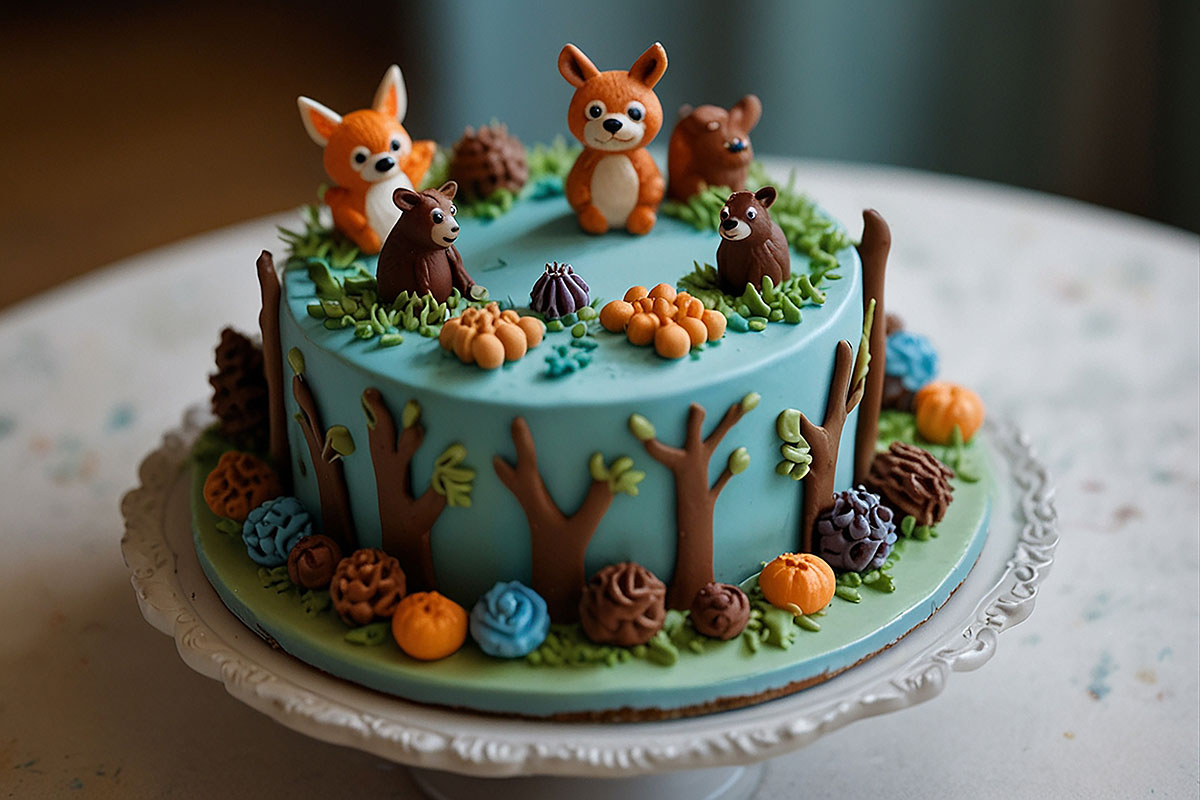
A key part of the design process is selecting a theme. Bluey and her family embark on various adventures, each offering unique thematic possibilities. Whether the birthday child loves the episode where Bluey and Bingo play doctors or the one where they become pirates, the possibilities are endless. Consider incorporating elements like pirate ships or medical kits into the cake’s design for a cohesive and exciting look.
For example, if you choose the pirate theme, you can create a cake that looks like a treasure chest, with Bluey and her friends as the pirates. This approach not only aligns with the child’s interests but also allows for imaginative decorations that elevate the overall aesthetic. Plus, you can enhance the theme with corresponding party decorations and games, creating a memorable experience.
For a detailed guide on planning the perfect children’s birthday party, including unique and exciting themes to make the day special, check out our Top Children’s Party Themes.
Selecting Colors and Patterns
The colors and patterns of your Bluey cake play a vital role in its visual appeal. The Bluey series is known for its vibrant and cheerful palette, typically featuring bright blues, yellows, and oranges. When selecting colors, consider using the characters’ signature hues to stay true to the show’s aesthetic.
Using contrasting colors can help specific design elements pop. For example, pairing Bluey’s bright blue with her sister Bingo’s softer orange creates a balanced and eye-catching color scheme. Incorporating patterns, such as polka dots or stripes, can add depth and interest to the cake’s design, especially when used to represent specific characters or elements from the show.
To enhance the cake’s visual appeal, you can also use edible images or custom cake toppers that feature the characters. This approach allows you to showcase intricate details without spending hours perfecting them by hand, ensuring your cake looks professional and polished.
Creating a Cake Blueprint
Before diving into the actual baking, it’s helpful to create a blueprint for your Bluey cake. A blueprint helps you visualize the final product and serves as a guide throughout the process, ensuring you stay on track and avoid any surprises. Sketch out the cake’s shape, layers, and decorations, and note the colors and elements you want to include.
Consider the cake’s size and how many layers it will have. Multiple layers can create a stunning and impressive effect, especially when combined with different fillings or flavors. However, remember that more layers mean more work, so plan accordingly based on your baking experience and the time you have available.
Selecting the Cake Type and Flavor
Choosing the right cake type and flavor is crucial for creating a Bluey cake that looks great and tastes delicious. Classic choices like chocolate or vanilla are always popular, but you can experiment with other flavors like red velvet or lemon for a unique twist. Consider the preferences of the birthday child and guests when selecting the flavor to ensure the cake is a hit.
In terms of cake type, sponge cakes are a great choice for layered designs, as they provide a light and airy base that pairs well with various fillings and frostings. Butter cakes, on the other hand, are denser and offer a rich, buttery flavor, which can be ideal if you’re looking for a more substantial cake. Whichever type you choose, ensure it’s something that complements the design and decorations you have planned.

Ingredients and Tools Needed
Gathering Your Materials
Before jumping into the baking process, it’s crucial to gather all the necessary ingredients and tools. This preparation ensures that you won’t have to stop midway to fetch something you forgot, which can be quite the pickle. Besides, gathering your materials in advance helps streamline the process, making it smoother and more enjoyable.
Ingredients List
When making a Bluey cake, the ingredients you choose play a pivotal role in achieving the desired flavor and texture. A classic cake usually involves basic ingredients like flour, sugar, butter, eggs, and baking powder. However, depending on the chosen flavor, you may also need cocoa powder for a chocolate cake or lemon zest for a lemon-flavored delight. Remember to factor in the filling and frosting as well, as they often require separate ingredients, like cream, powdered sugar, or fruit preserves.
The key to a successful cake lies in the quality of your ingredients. Opting for fresh, high-quality products ensures your cake tastes as good as it looks. Additionally, if you have dietary restrictions or preferences, you might want to consider alternative ingredients, such as gluten-free flour or plant-based butter.
Required Baking Tools
Baking a Bluey cake also requires specific tools to ensure you can create the desired shapes and designs. Essential items include mixing bowls, measuring cups, and a mixer, whether handheld or stand-alone, for preparing the batter and frosting. You’ll also need baking pans, typically round or square, but you might opt for custom-shaped pans if you’re aiming for a unique design.
For decorating, you’ll need tools like a spatula for spreading the frosting evenly and piping bags with various nozzles to create intricate designs. If you plan to use edible images or cake toppers, ensure you have food-safe glue or toothpicks to secure them. Using these tools will help you achieve a professional-looking finish, adding to the cake’s overall appeal.
Creating a Checklist
A checklist helps keep track of your ingredients and tools, ensuring you have everything you need before starting. Make a list of all the necessary items, including any special decorations or edible images you plan to use. Cross-check this list against your inventory to identify any gaps, and make a note to pick up any missing items before you start baking.
Having a checklist also helps with time management. By preparing everything in advance, you can focus on the actual baking and decorating, allowing you to enjoy the process without unnecessary interruptions. Plus, a checklist ensures you don’t overlook any crucial ingredients or tools, which could impact the final product.
Setting Up Your Workspace
Setting up your workspace is another vital step in preparing to bake a Bluey cake. A well-organized workspace helps you work efficiently and prevents potential mishaps, like knocking over a bowl of flour. Make sure your counter is clear and clean, and lay out all your ingredients and tools within easy reach.
Consider setting up different stations for each stage of the process. For example, have one area designated for mixing the batter and another for assembling and decorating the cake. This setup helps streamline the process, making it easier to transition from one step to the next. Additionally, it minimizes the chances of cross-contamination, especially if you’re working with allergens or other sensitive ingredients.
Step-by-Step Baking Guide
Baking Your Bluey Cake
Now that you have planned and gathered all the necessary ingredients and tools, it’s time to bake your Bluey cake. The process can be quite an adventure, but with a step-by-step guide, you’ll navigate it like a seasoned pro. Let’s dive into the nitty-gritty of creating a cake that looks as delightful as it tastes.
Preparing the Batter
The first step is to prepare the batter, which forms the foundation of your Bluey cake. Start by preheating your oven to the temperature specified in your recipe, typically around 350°F (175°C). Grease and flour your baking pans to prevent the cake from sticking. Mix the butter and sugar in a big bowl until the mixture is airy and smooth. Then, add the eggs individually, ensuring to mix thoroughly after each addition.
In a separate bowl, combine the dry ingredients, such as flour, baking powder, and a pinch of salt. Gradually add this mixture to the wet ingredients, alternating with a liquid like milk or buttermilk, to create a smooth batter. Mix just until combined, being careful not to overmix, as this can lead to a dense cake.
Baking Instructions
Once your batter is ready, divide it evenly between the prepared baking pans. Use a spatula to level the tops for uniform baking. Place the pans in the oven and bake until a toothpick inserted into the center comes out clean. The baking time will vary depending on the size and shape of your pans, but it’s usually around 25 to 30 minutes.
During this time, resist the urge to open the oven door frequently, as sudden temperature changes can cause the cake to sink. Instead, use the oven light to monitor the cake’s progress. Once baked, remove the pans from the oven and allow the cakes to cool in the pans for about 10 minutes before transferring them to a wire rack to cool completely.
Cooling and Prepping for Decoration
After baking, the cakes need to cool completely before you start decorating. This step is crucial, as decorating a warm cake can lead to melting frosting and a less-than-ideal presentation. While the cakes cool, you can prepare the frosting or any fillings you plan to use. For example, you might opt for a classic buttercream, a whipped cream frosting, or a chocolate ganache, depending on your preference and theme.
Once the cakes are cool, level them using a serrated knife or a cake leveler. This step ensures that the layers stack evenly, providing a stable base for your Bluey cake. You can also trim the edges or shape the cakes if you’re aiming for a unique design. After leveling, brush away any crumbs and place the first layer on a serving plate or a cake stand, ready for assembly and decoration.
Creating a Bluey cake requires careful planning, precise execution, and a bit of creativity. If you’re interested in further expanding your cake-making skills, check out Step-by-Step Baking Guide for tips on making your next celebration even more special. Additionally, if you’re experimenting with vegan options, you might find inspiration from Vegan Baking Recipes, which offers numerous alternatives for plant-based baking.
Next, we’ll move on to the exciting part: decorating your Bluey cake!
Decorating Your Bluey Cake
Decorating Tips and Tricks
Now that you have successfully baked and cooled your Bluey cake, it’s time for the fun part: decorating! This step allows you to unleash your creativity, bringing your cake design to life. The goal is to create a visually appealing cake that captures the spirit of the Bluey series while tantalizing the taste buds of your guests.
Explore expert tips on cake decorating, from simple to advanced techniques, in our Cake Decorating Tips for Beginners. Elevate your cake designs to the next level!
Icing Techniques
The icing is crucial for any cake, setting the tone for the design. Start with a base layer, often called the “crumb coat,” which helps trap any loose crumbs and provides a smooth surface for the final layer of icing. Spread a thin layer of your chosen frosting over the entire cake, then refrigerate it for about 30 minutes to set.
For the final layer, you can apply the frosting using a spatula for a rustic look or a piping bag for a more polished finish. If you want to create a smooth, professional-looking surface, use a bench scraper or offset spatula to spread the icing evenly. You can also experiment with different piping tips to create decorative borders or patterns, adding texture and dimension to your Bluey cake.
Using Edible Images
Edible images are a fantastic way to incorporate the Bluey characters directly into your cake design. These images are made from edible ink and wafer paper or frosting sheets, which can be easily applied to the cake. Place the image on top of the frosting, gently pressing it to adhere. You can further embellish the image with piped borders or additional decorations to blend it seamlessly into the cake’s overall design.
If you prefer a more hands-on approach, consider using fondant to create character cutouts or 3D figures. Fondant is a pliable icing that can be molded into various shapes and colored to match the characters. This technique allows you to showcase your creativity and crafting skills, making the cake unique and personalized.
Final Touches
The final touches are all about adding those little details that make your Bluey cake stand out. Sprinkle edible glitter or colored sugar over the cake for a touch of sparkle. Add decorative elements like edible pearls, fondant flowers, or themed cake toppers to enhance the overall design. If you’re feeling adventurous, you can even create a scene from the show using toy figurines or edible decorations.
While adding these final touches, keep the theme and the birthday child’s preferences in mind. Whether you’re focusing on a specific character or creating a scene from the show, ensure the design is cohesive and aligns with the theme you chose in the planning stage. This attention to detail will create a stunning cake that will be a highlight of the celebration.
If you’re looking for further inspiration and guidance on decorating cakes, check out this wilton site, which offers custom edible cake toppers to suit any theme. Additionally, if you’re keen on exploring unique cake flavors, take a peek at the Cake Flavors Guide: Discover Popular and Unique Choices for more insights.
In the next section, we will address frequently asked questions about Bluey cakes, covering topics like storage advice, allergy information, and even how to make a vegan Bluey cake. Let’s move on!
Frequently Asked Questions (FAQs)
Creating a Bluey cake is a rewarding experience, but it often comes with many questions, especially for those new to baking or dealing with dietary concerns. In this section, we’ll address some common queries related to Bluey cakes to help you create a delightful and hassle-free masterpiece.
Storage Advice
One of the frequently asked questions about Bluey cakes is how to store them properly. The key is to keep the cake fresh without compromising its design. If the cake is covered in buttercream frosting, you can store it at room temperature for up to two days. However, if you’ve used cream-based frosting or fillings, it’s best to refrigerate the cake to prevent spoilage.
To keep the cake fresh, cover it with a cake dome or an airtight container. If you need to store the cake for a more extended period, consider freezing it. Wrap the cake tightly in plastic wrap and then in aluminum foil before placing it in the freezer. When ready to serve, allow the cake to thaw at room temperature for a few hours or overnight in the refrigerator.
Allergy Information
Dietary allergies are a common concern when baking cakes, particularly for events with many guests. Bluey cakes typically include ingredients like eggs, dairy, and gluten, which are common allergens. To accommodate guests with dietary restrictions, you can opt for allergy-friendly ingredients, such as egg substitutes, plant-based milk, and gluten-free flour.
When preparing a cake for someone with allergies, ensure that all equipment and surfaces are thoroughly cleaned to avoid cross-contamination. Labeling the cake clearly as allergy-friendly can also help reassure guests, making them feel more comfortable enjoying the dessert.
Making a Vegan Bluey Cake
Creating a vegan Bluey cake is not only possible but also a fun and rewarding challenge. To make a vegan cake, you can use plant-based substitutes for common ingredients like eggs and dairy. Applesauce or flaxseed meal can replace eggs, while coconut or almond milk can stand in for dairy milk.
Vegan butter or coconut oil can replace traditional butter in both the cake batter and the frosting. Using a plant-based cream cheese or margarine is also an excellent option for creating a creamy, dairy-free frosting. The key to a successful vegan cake is balancing flavors and textures, ensuring that the final product is as delightful and delicious as its traditional counterpart.
If you want more information on creating allergy-friendly cakes, check out Vegan Baking Recipes for great ideas and tips. Additionally, for inspiration on unique cake designs, explore the Children’s Party Planning Guide to find fun themes and decorations that align with your Bluey cake.
In the final section, we’ll conclude with some final thoughts and presentation tips to help you showcase your Bluey cake in the best possible light. Let’s wrap things up!

Conclusion
Final Thoughts and Presentation Tips
Now that you’ve crafted a fantastic Bluey cake, the final step is presenting it with style. After all the hard work, you want to showcase your creation in a way that highlights its beauty and craftsmanship. Presentation plays a crucial role in creating a memorable impression, so let’s explore some tips for presenting your Bluey cake perfectly.
Choosing a Cake Stand
A cake stand is an excellent way to elevate your Bluey cake, literally and figuratively. It adds height and elegance, making the cake the centerpiece of the celebration. Choose a stand that complements the cake’s theme and colors. For instance, a simple, white stand offers a classic and versatile look, while a colorful or patterned stand can add a touch of whimsy, enhancing the cake’s appeal.
Setting the Table
The table setting contributes to the overall presentation of your Bluey cake. Consider using themed tablecloths, napkins, and decorations to match the cake’s theme and the broader party decor. Surround the cake with complementary items, such as party favors or small decorations, to create a cohesive look. Adding a personalized cake topper or a decorative banner can also enhance the presentation, making the cake feel special and tailored to the celebration.
Lighting and Photography
Proper lighting can make your Bluey cake look even more stunning. Natural light is ideal for showcasing the cake’s colors and details, so place it near a window or outdoors if possible. If natural light isn’t available, use soft, diffused lighting to avoid harsh shadows and highlight the cake’s features. Take a few moments to photograph the cake before cutting it, capturing the details and effort you’ve put into the design.
When photographing the cake, try different angles to find the most flattering perspective. Capture close-up shots of unique details and wide shots of the entire cake. These photos serve as a lovely keepsake and can be shared with family and friends or used to showcase your baking skills.
Enjoying the Cake
After all the planning, baking, and decorating, the most important part is to enjoy the Bluey cake with your loved ones. Cut and serve the cake, savoring the flavors and celebrating the special occasion. Your efforts have created a memorable experience for everyone involved, and now it’s time to bask in the joy of a job well done.
Creating a Bluey cake is an exciting and rewarding experience that combines creativity, planning, and a touch of magic. By following the steps outlined in this article, you’ve learned how to design, bake, and decorate a delightful cake that will bring joy to any celebration. Here’s to many more successful baking adventures in the future!